
Setting Your Schedule
How to set up your first provider schedule in MarketBox as a provider
After adding your travel zones, you go ahead and set your schedule either on the provider mobile app or the desktop site.
On the Provider Mobile App
1. Go to My Availability (left-hand navigation bar).
2. Press the Plus icon on the top right corner.
3. Select a Location (one of your travel zones, a physical company location, or virtual).
4. Select the Services you offer for this schedule.
5. Specify which days this schedule repeats on.
6. Specify a Start and End Time.
7. If your schedule is indefinite, make sure the No End Date toggle is OFF.
8. If not, specify a Start and End Date.
9. Press Save.
A green circle will appear beside an active schedule.
On the Desktop Site
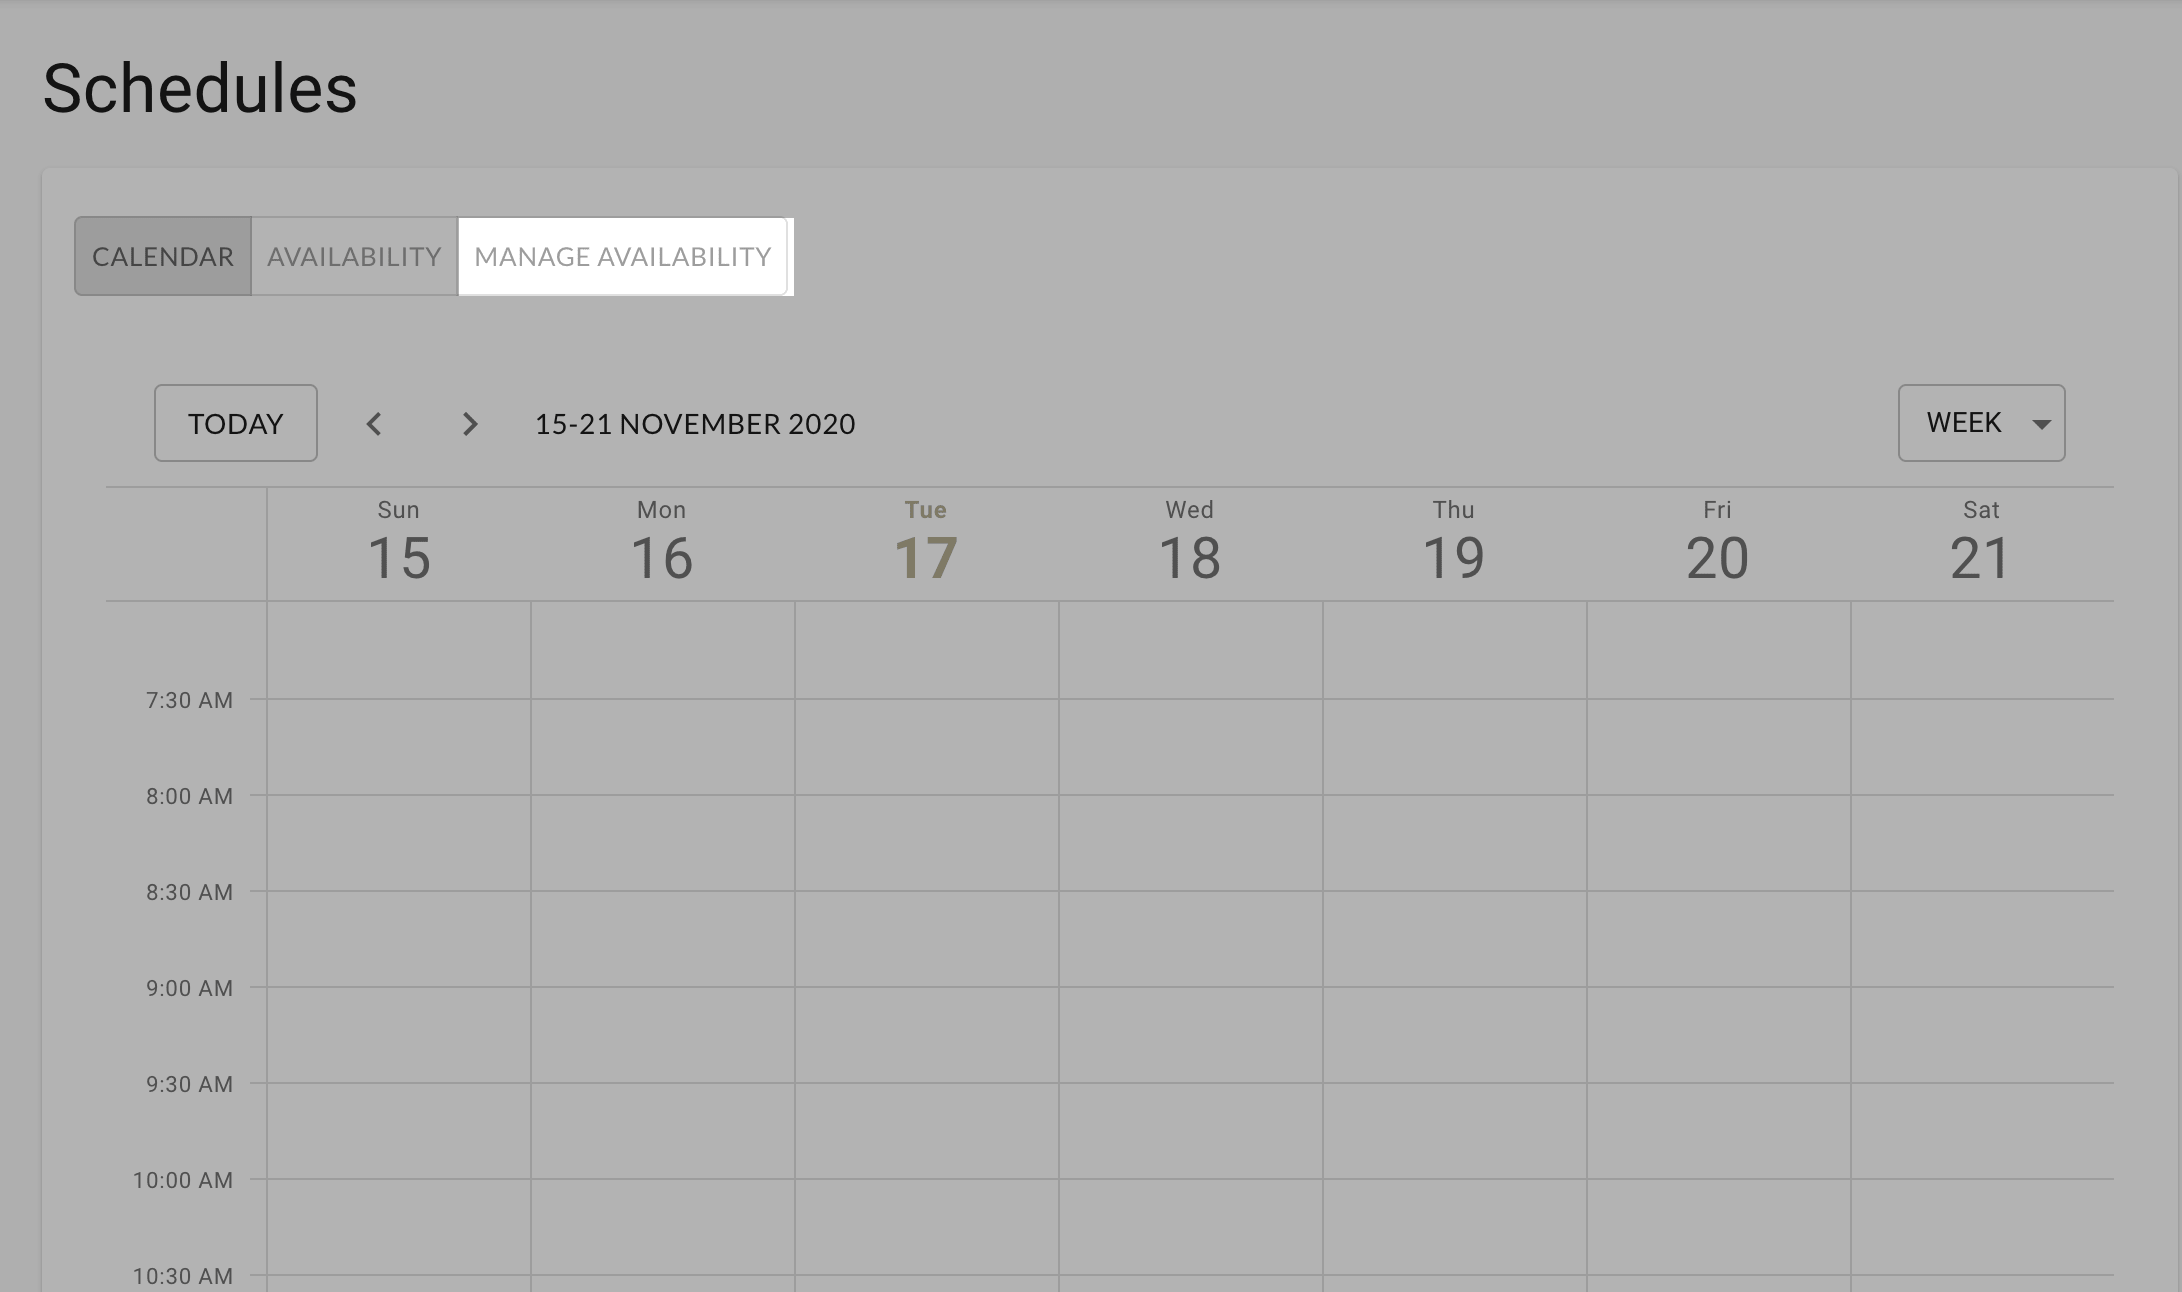
1. Log in to your Provider account and navigate to your My Schedules.
2. Select the Manage Availability tab.
3. Click the New Schedule button.
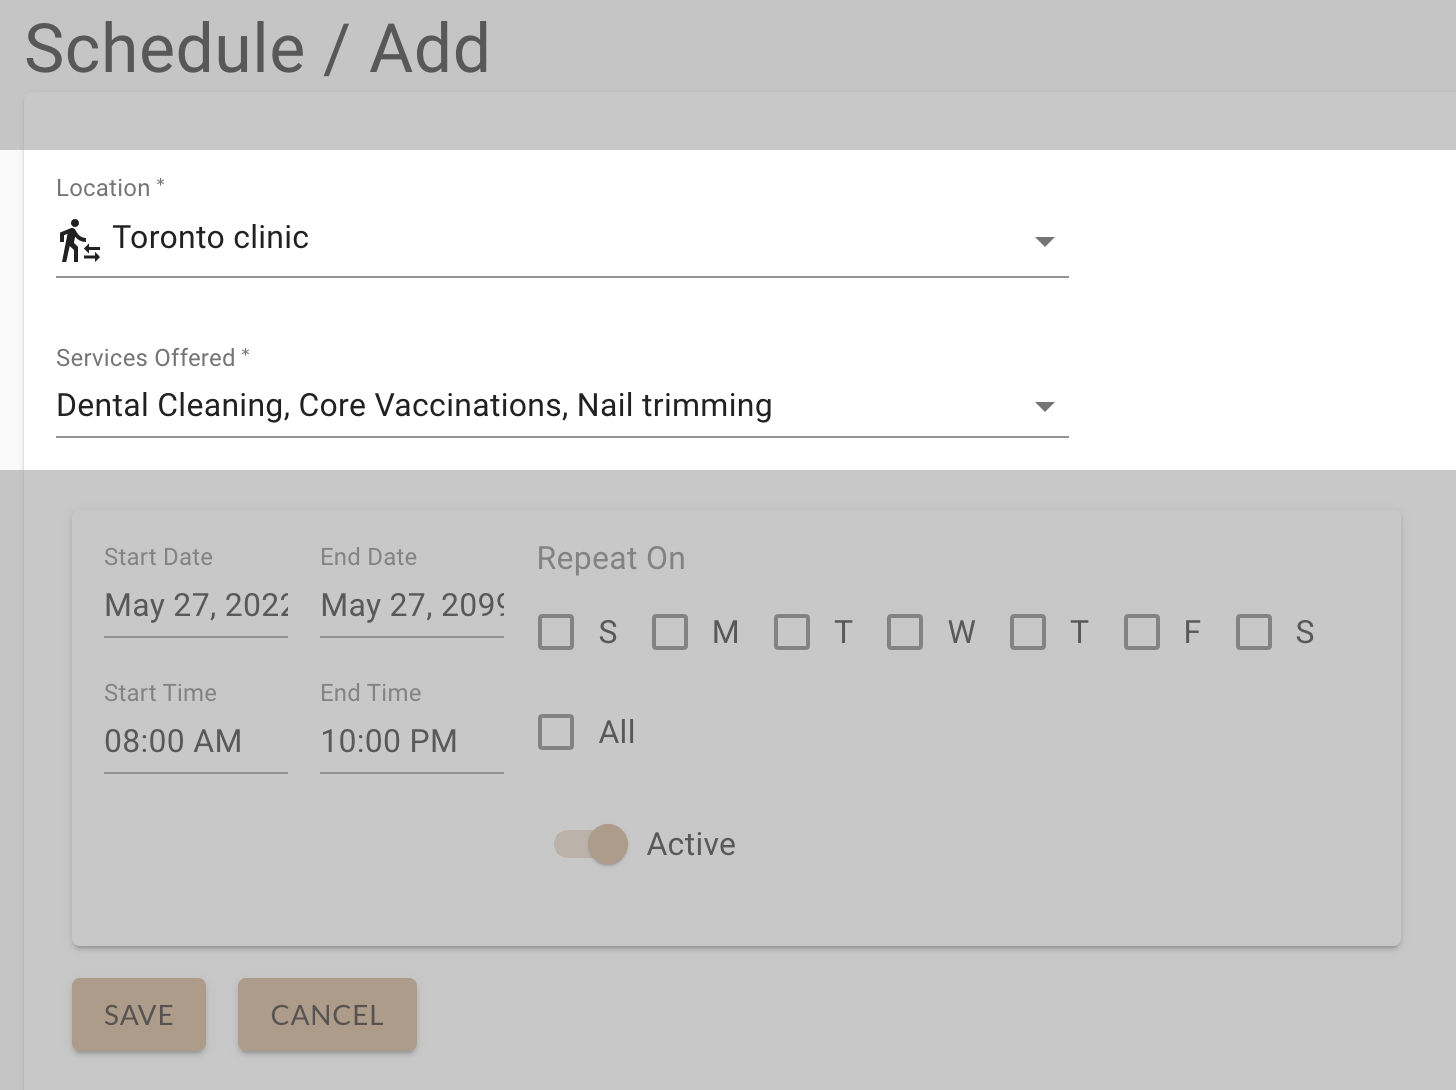
4. Select the Location (travel zone, physical company location, or virtual) and Service being offered.
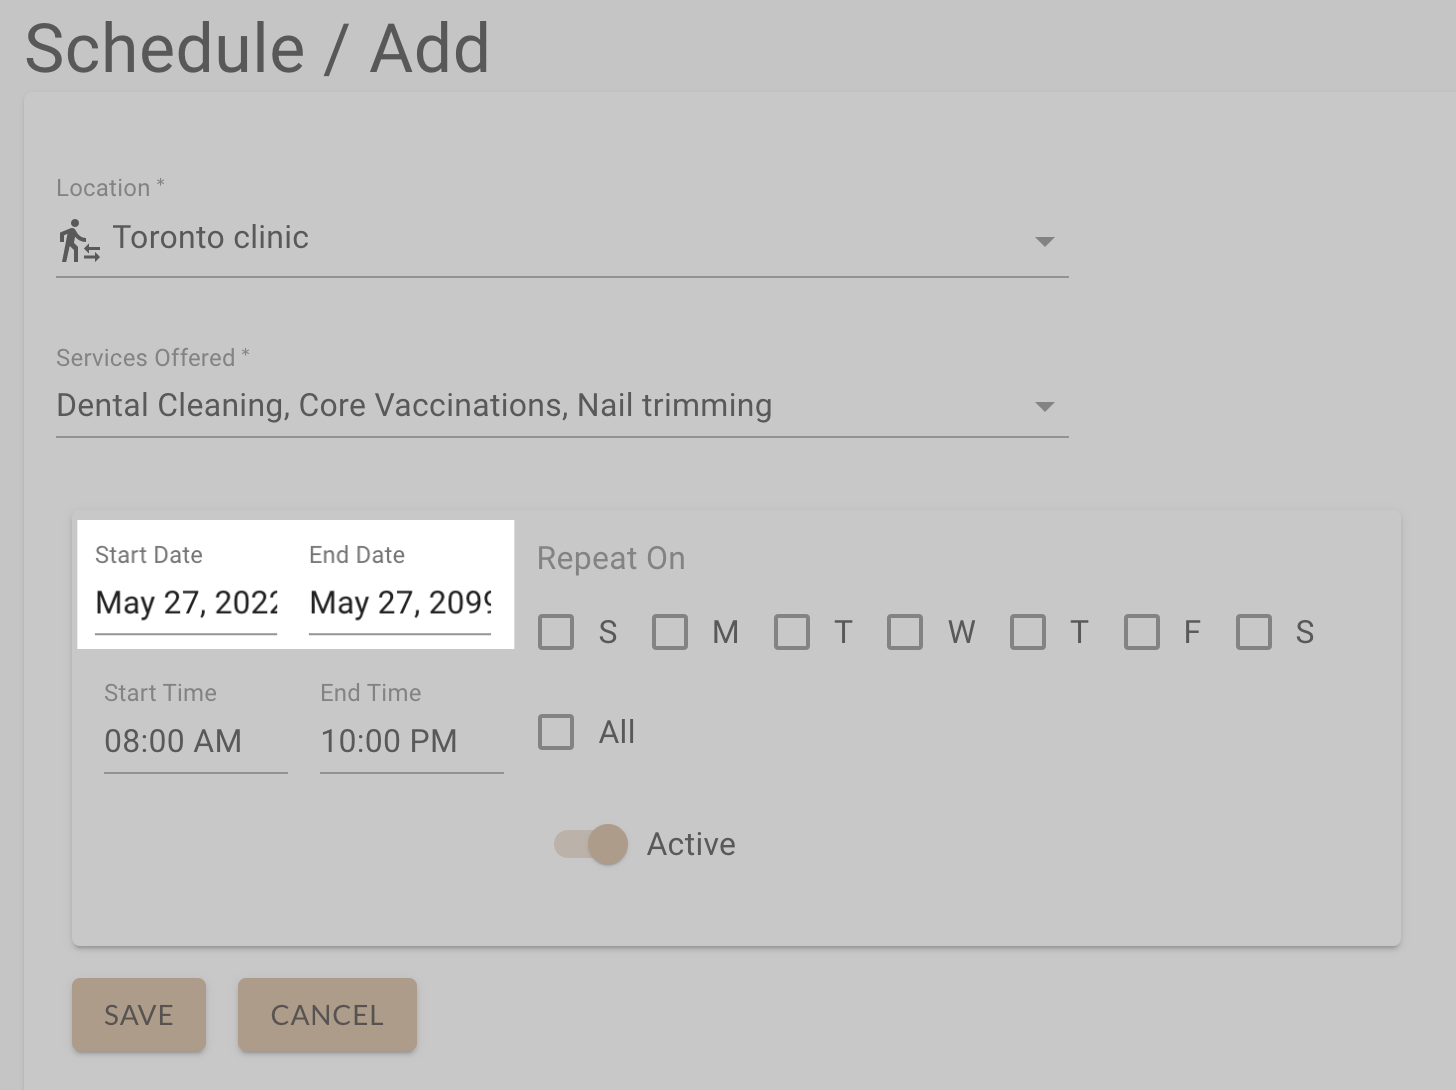
5. Specify a Start Date, End Date.
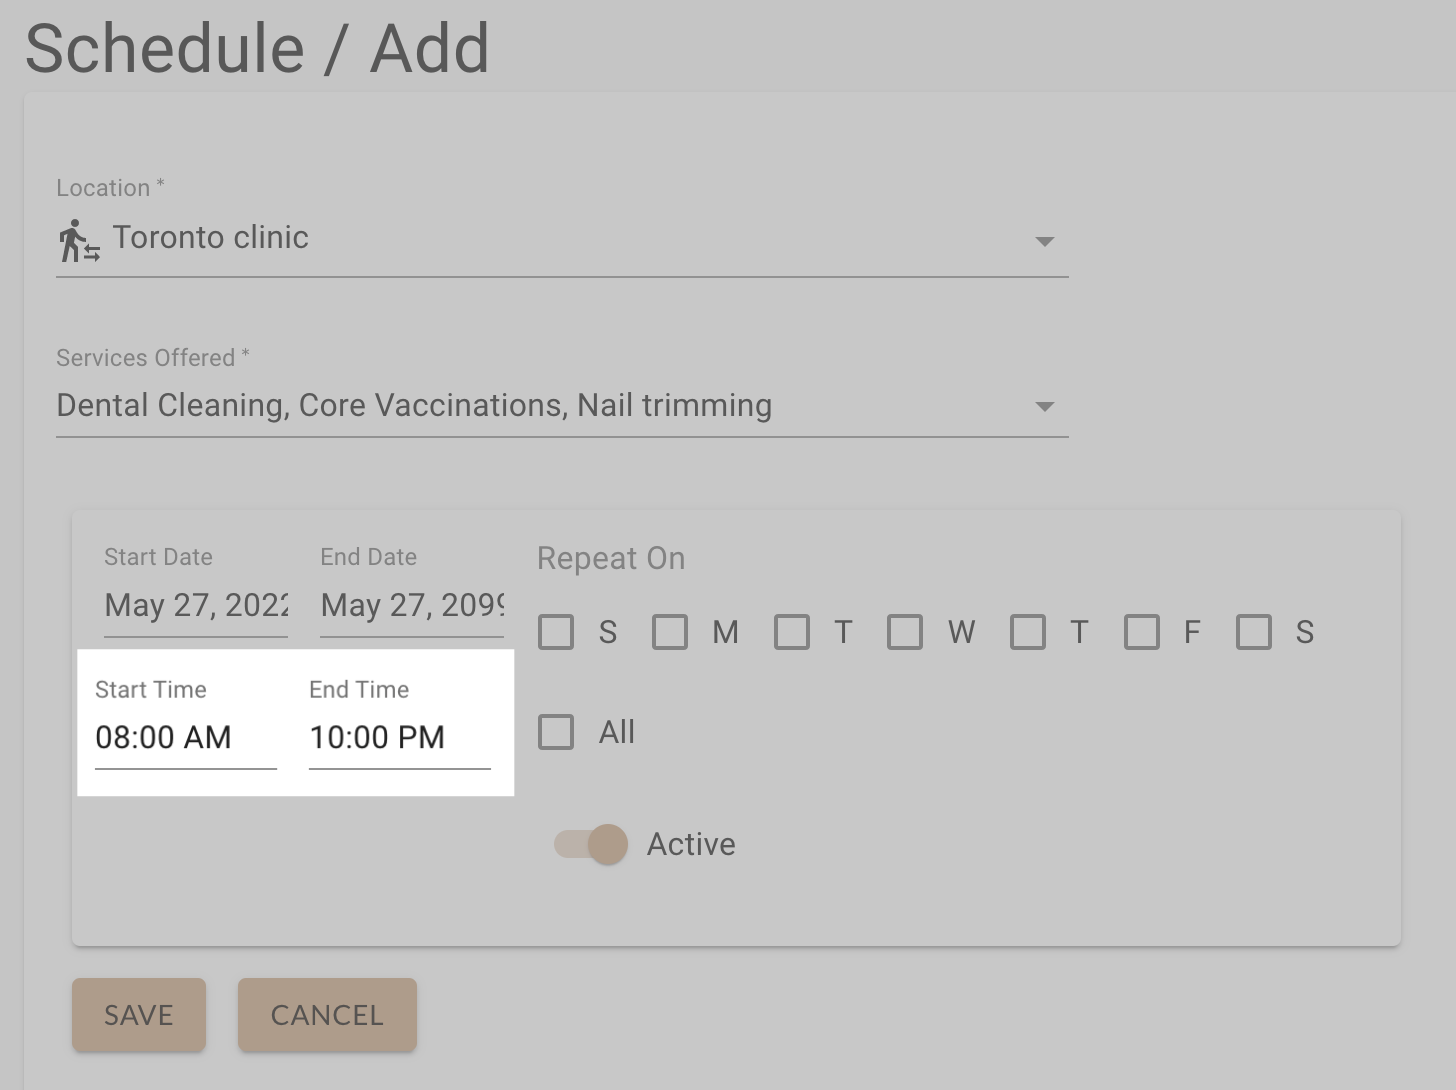
6. Specify a Start Time and End Time.
7. Specify whether this schedule Repeats On certain days.
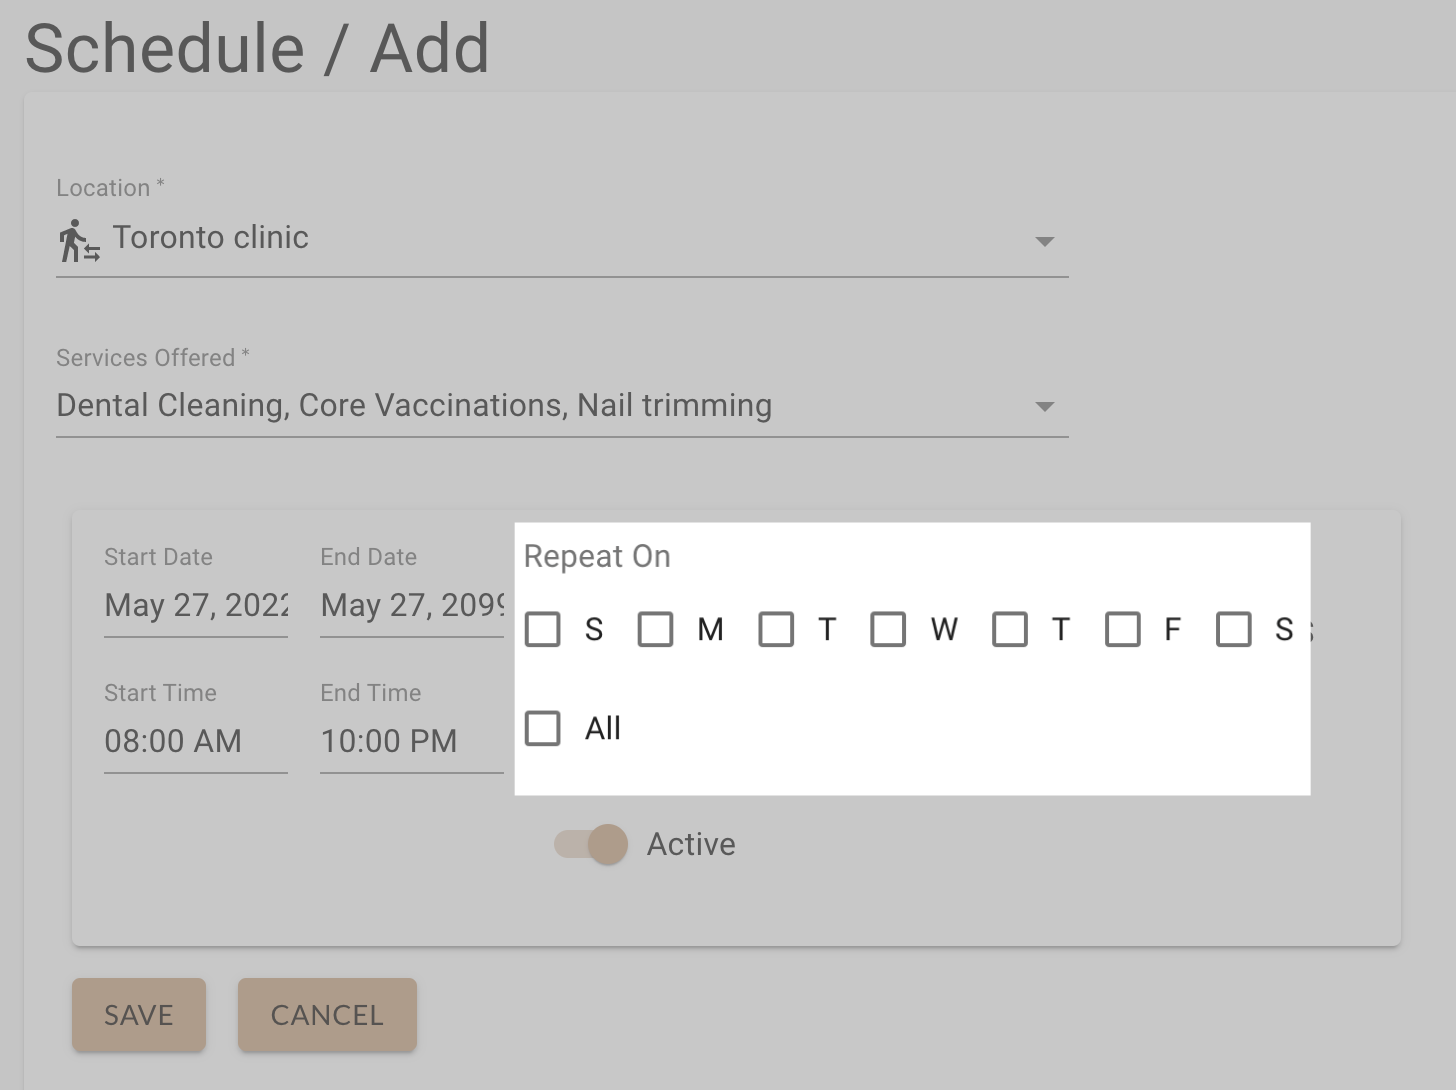
8. Make sure the Active switch is toggled On.
9. Hit Save.
A green circle will appear beside an active schedule.
Check out this article on how to update or edit your provider schedule.
To learn how to set up a virtual schedule, click here.