A provider can create different travel zones with specific hours and availability.
Here are a few examples of how this feature is used:
- During the week, you work in Toronto but on weekends you work in Mississauga
- During the summer, you will be in Toronto and want to offer services there
First, you are going to add another travel zone
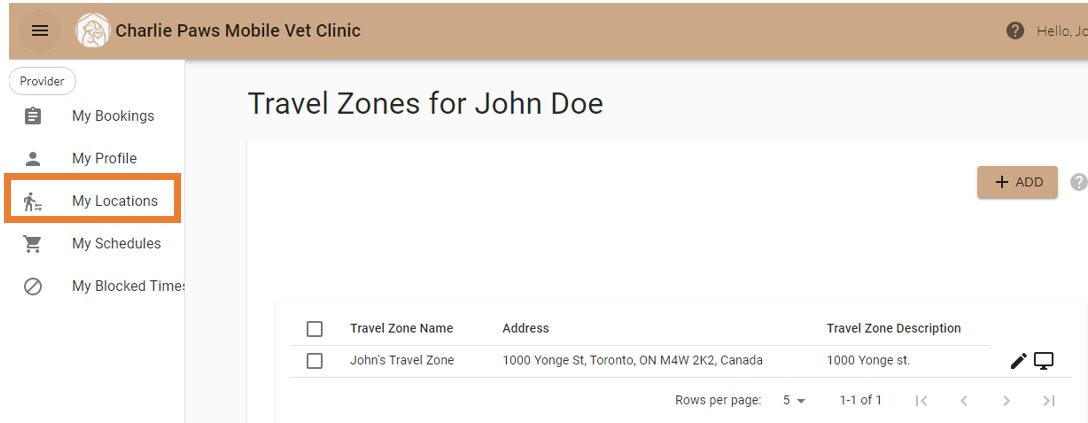
1. Login as a Provider
2. Go to My Locations
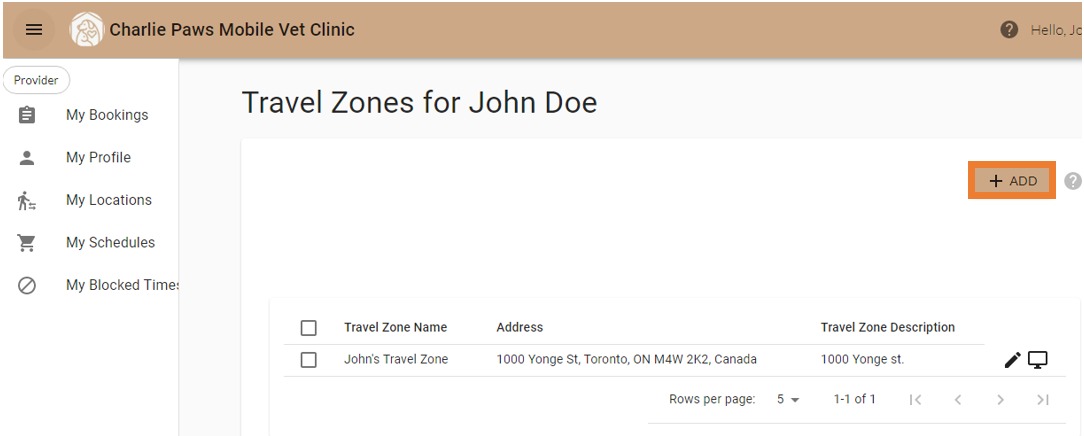
3. Click Add
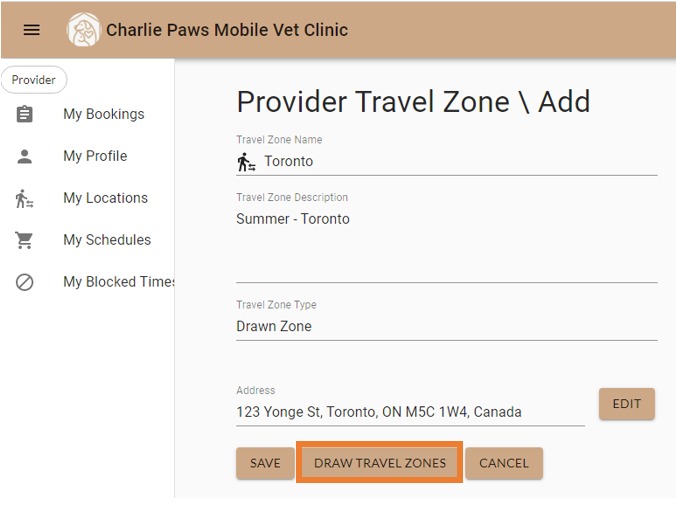
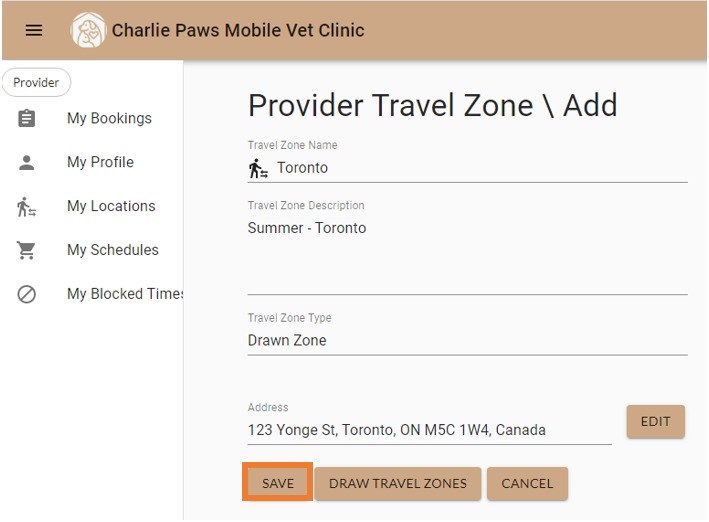
4. Enter in Travel Zone Name, Description, and Address

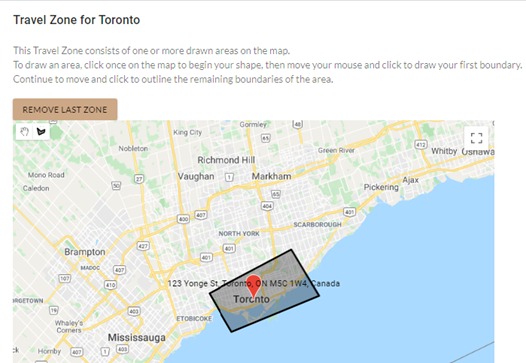
5. Click Draw Travel Zones
6. Click to outline boundaries of the area
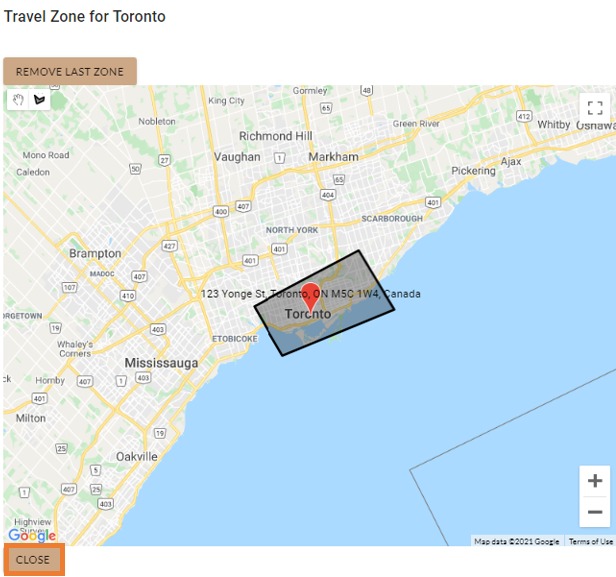
7. Click Close
8. Click Save
9. You have now added another travel zone area
Second, you are going to add the desired travel zone into your availability
1. Go to My Schedules
.png)
2. Click Manage Availability
.png)
3. Click New Schedule
.png)
4. Enter in Location, Services, Start Date, End Date, Time, and Days
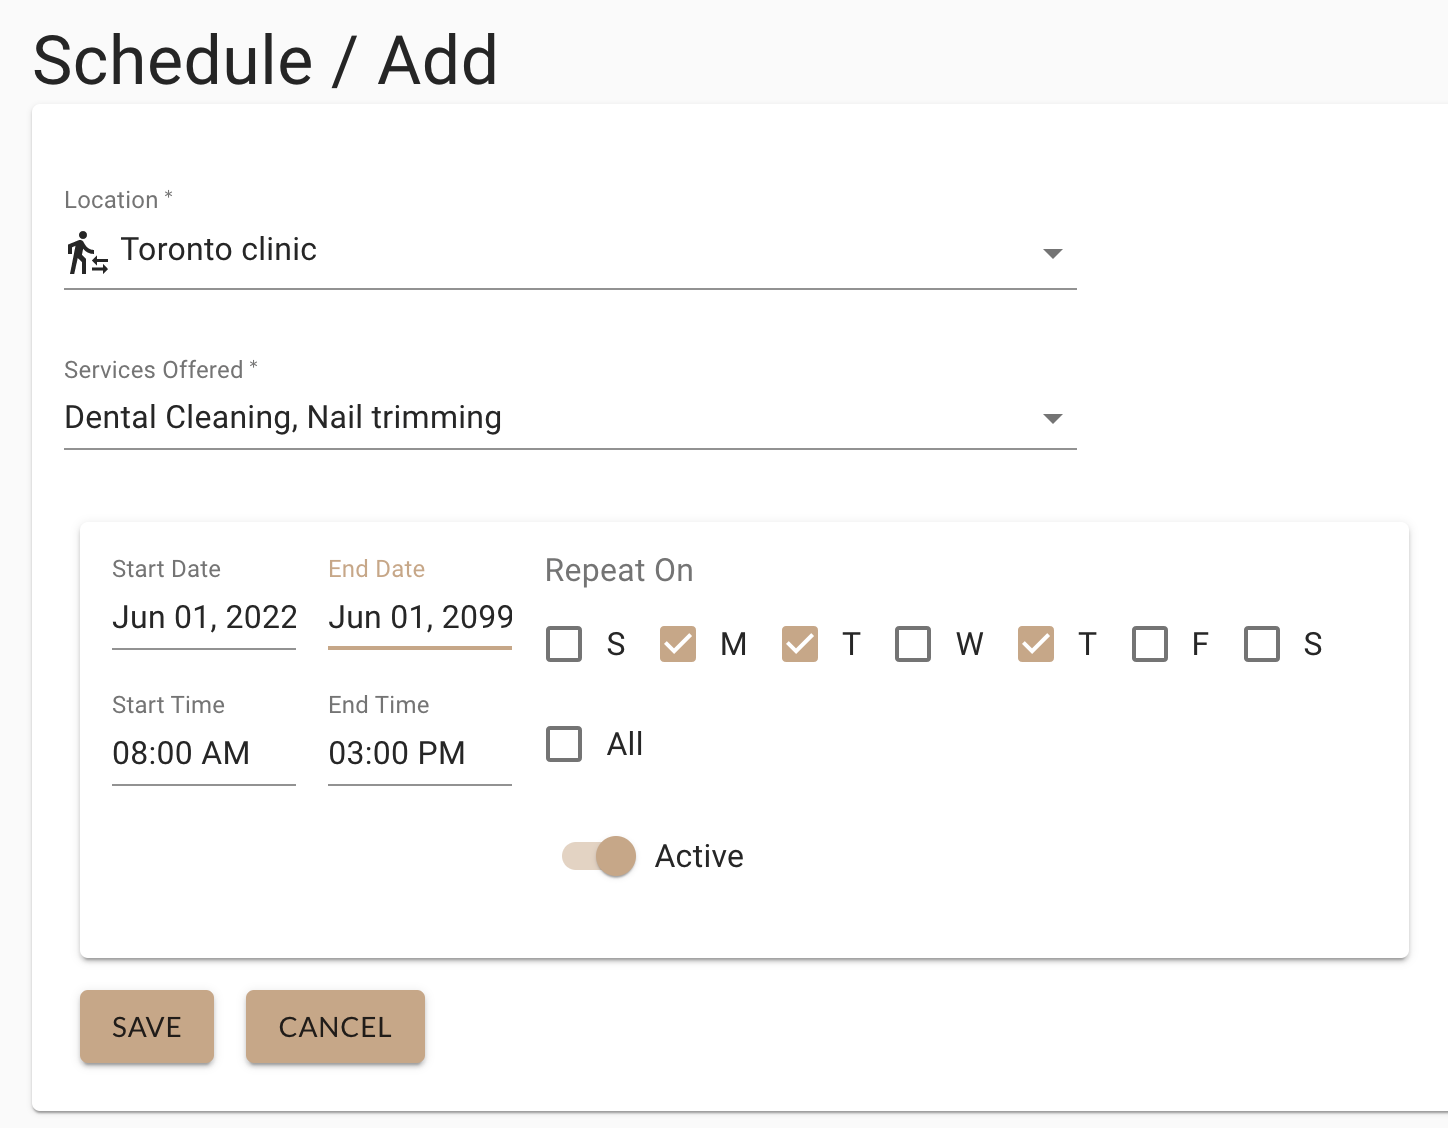
5. Click Save
6. You have now added your availability with the new travel zone
.png)
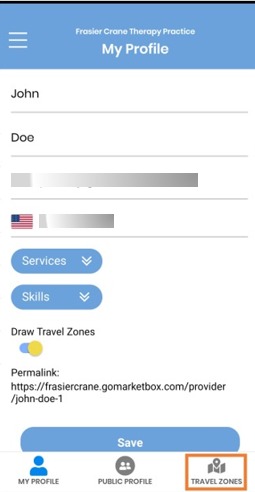
Using the Provider Mobile App
1. Login using your email address and password
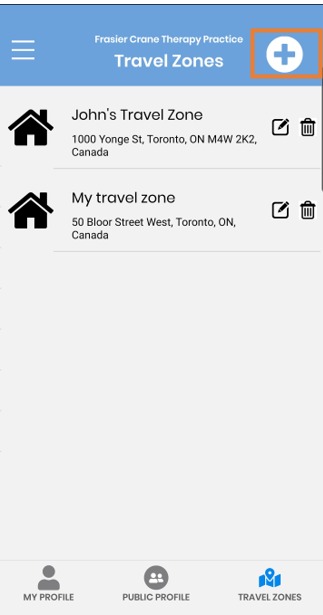
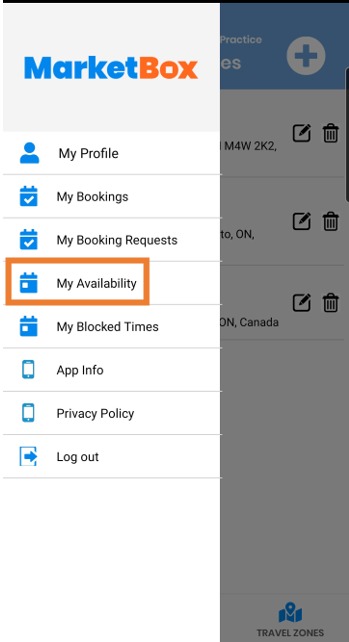
2. Go to Travel Zones
3. Click Add (Plus Sign)
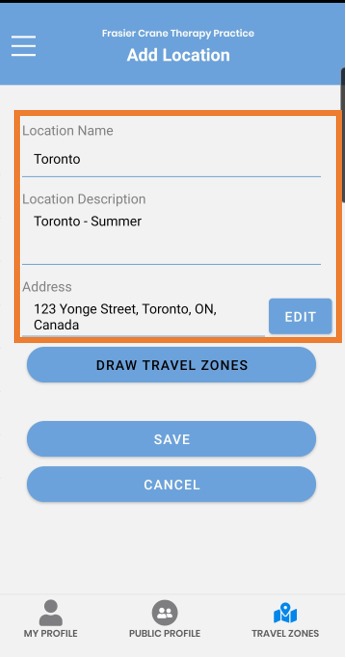
4. Enter in Location Name, Description, and Address
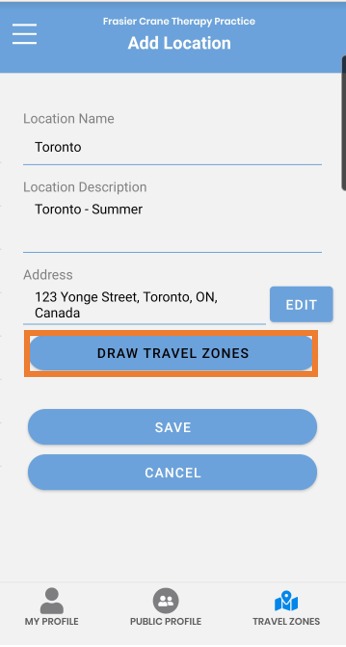
5. Click Draw Travel Zones
6. Click to outline boundaries of the area
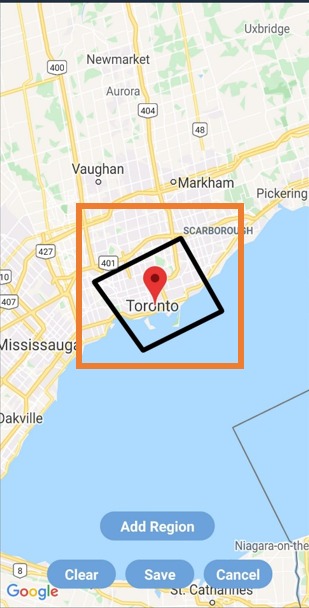
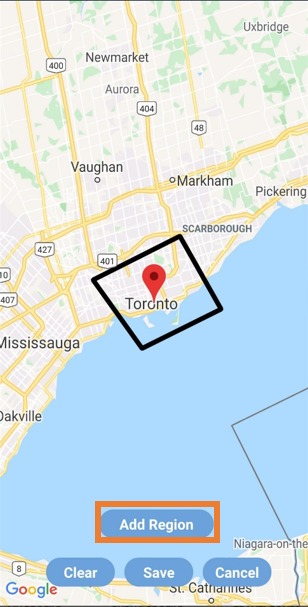
7. Click Add Region
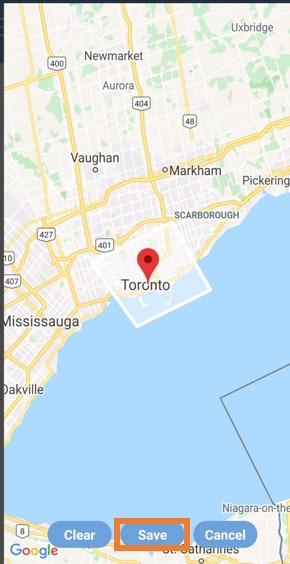
8. Click Save
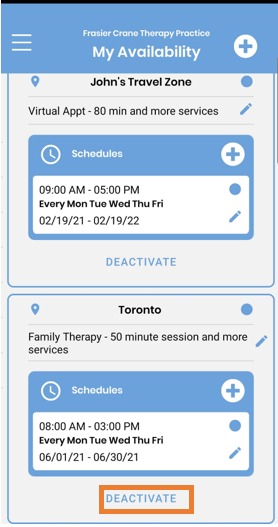
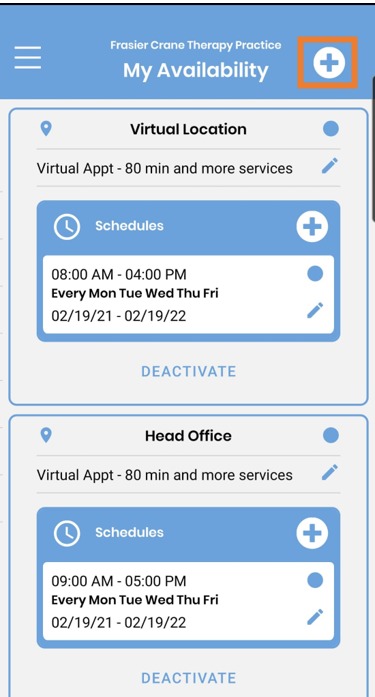
9. Go to My Availability
10. Click Add (Plus Sign)
11. Click off the Location, Services, Start Date, End Date, Time, and Days
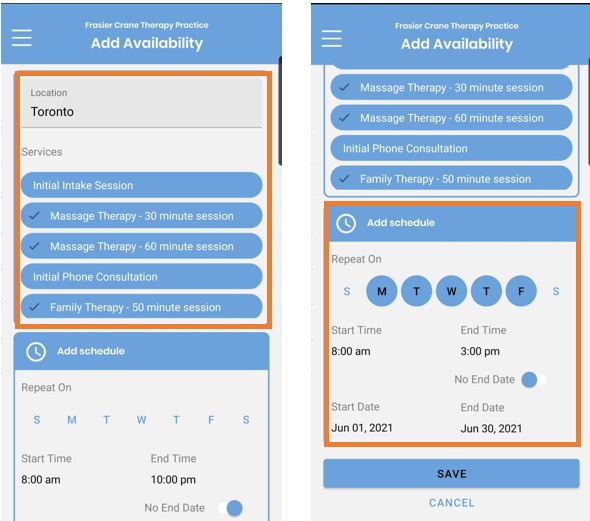
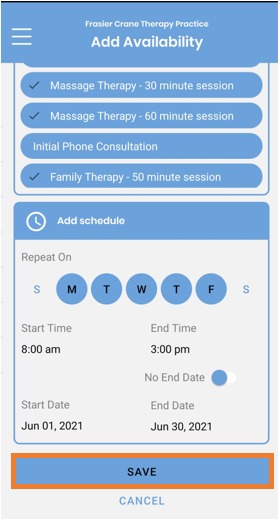
12. Click Save
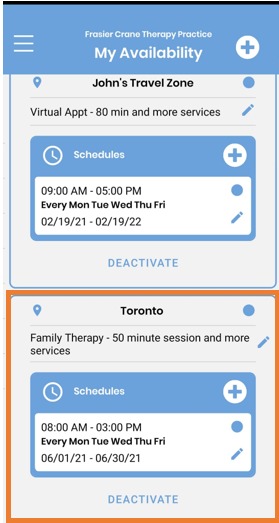
13. You have now added your availability with the new travel zone
14. Click Deactivate if you no longer want the location to be booked by clients